
No-Bake Peanut Butter Bars
No-bake peanut butter bars are one of those recipes that earn a permanent spot in my kitchen rotation. They’re rich, comforting, and deeply satisfying, yet they don’t require an oven, special equipment, or perfect timing. When I want something that tastes indulgent but comes together quickly, these bars are always the answer. They remind me of classic lunchbox treats, but with a more grown-up, balanced sweetness that makes them hard to stop eating.
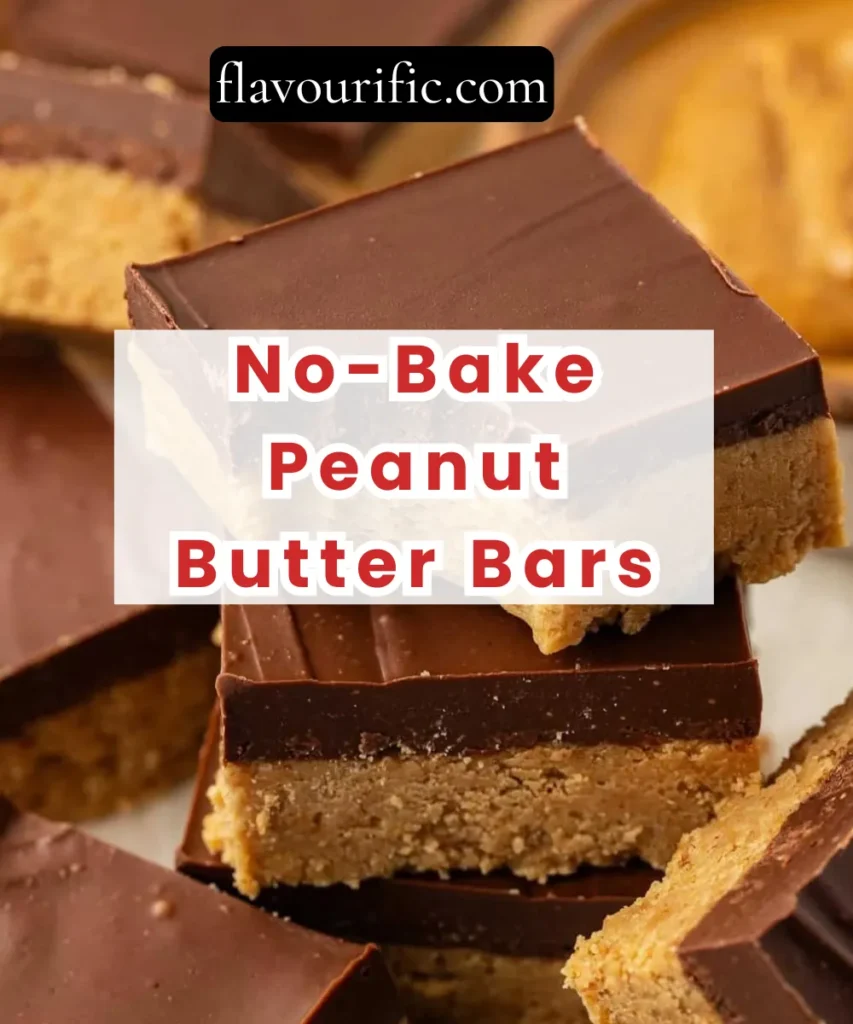
What I appreciate most about these bars is their reliability. The base is sturdy but soft, the peanut butter flavor is front and center, and the chocolate topping adds just enough contrast to keep every bite interesting. They slice cleanly, store well, and somehow taste even better the next day.
Ingredients
Peanut Butter Base
- 1½ cups creamy peanut butter
- ½ cup unsalted butter, melted
- 1½ cups powdered sugar
- 1½ cups graham cracker crumbs
- 1 teaspoon vanilla extract
- Pinch of salt
Chocolate Topping
- 1½ cups semi-sweet chocolate chips
- 2 tablespoons peanut butter or butter
Optional Add-Ins
- ¼ cup crushed peanuts
- ¼ cup mini chocolate chips
- 1 tablespoon flaxseed or chia seeds
- ½ teaspoon cinnamon for warmth
Instructions / Method
Step 1: Prepare the Pan
- Line an 8×8-inch pan with parchment paper
- Leave overhang on the sides for easy removal
This makes slicing clean and effortless later.
Step 2: Mix the Peanut Butter Base
In a large bowl, combine:
- Creamy peanut butter
- Melted butter
- Powdered sugar
- Vanilla extract
- Salt
Mix until smooth and fully blended.
Step 3: Add the Structure
Stir in:
- Graham cracker crumbs
Mix until the mixture becomes thick and dough-like.
The texture should be:
- Soft
- Pressable
- Not sticky
If it feels too soft, add more crumbs one tablespoon at a time.
If too dry, add a small spoon of peanut butter.
Step 4: Press Into the Pan
- Transfer the mixture to the prepared pan
- Press firmly and evenly using the back of a spoon or spatula
Take your time here — a compact base helps the bars hold together.
Step 5: Make the Chocolate Layer
In a microwave-safe bowl, combine:
- Chocolate chips
- Peanut butter or butter
Microwave in 20–30 second intervals, stirring between each, until smooth and glossy.
Step 6: Spread the Chocolate
- Pour the melted chocolate over the peanut butter base
- Spread evenly with an offset spatula
Tap the pan gently on the counter to smooth the surface.
Step 7: Chill Until Set
- Refrigerate for 1–2 hours
The bars should feel firm to the touch before slicing.
Step 8: Slice and Serve
- Lift the bars out using the parchment
- Slice into squares or rectangles
- Wipe the knife clean between cuts for neat edges
Preparation & Timing
- Prep Time: 20 minutes
- Chill Time: 1–2 hours
- Total Time: About 2 hours
- Yield: 16–20 bars
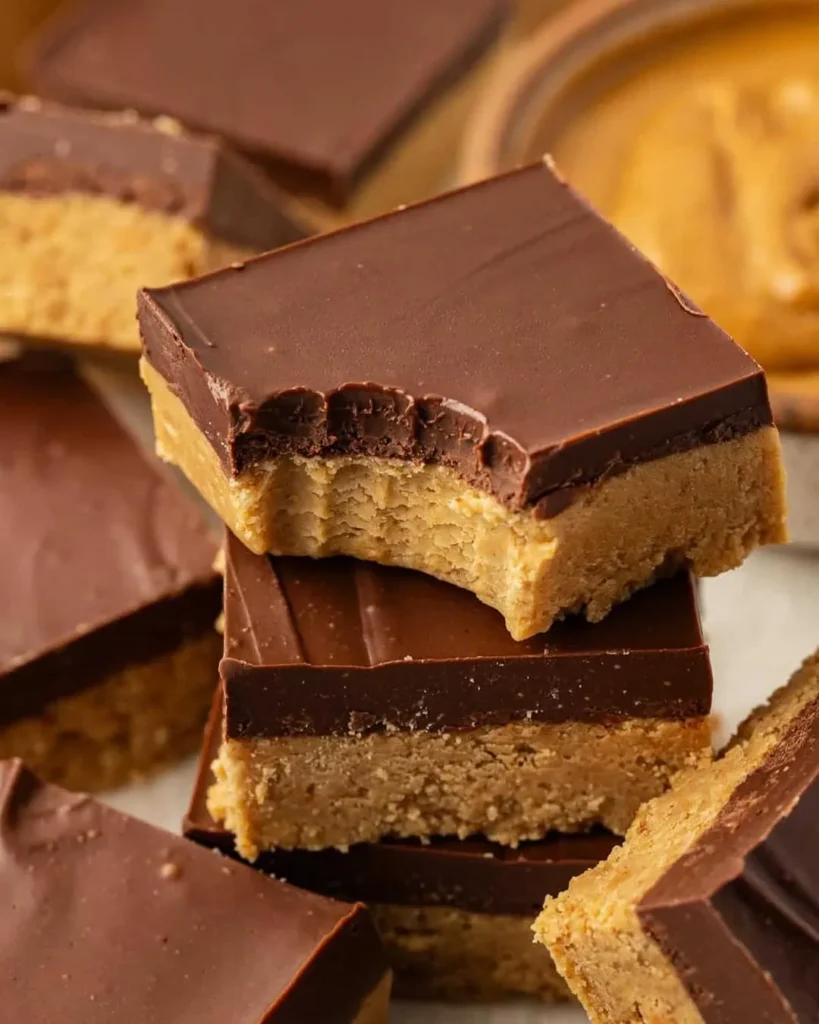
Texture and Flavor Breakdown
These no-bake peanut butter bars deliver:
- A soft, creamy base that melts slightly as you bite
- Strong peanut butter flavor without bitterness
- Smooth chocolate topping with a gentle snap
- Balanced sweetness that doesn’t overwhelm
They’re rich, but not heavy, making them easy to enjoy in small portions.
Why No-Bake Bars Work So Well
No-bake desserts like this succeed because:
- There’s no risk of overbaking
- Textures stay consistent every time
- Ingredients stay true to their original flavors
- Prep is quick and stress-free
This makes them especially useful for busy days, warm weather, or last-minute dessert needs.
Tips for Perfect Peanut Butter Bars
- Use creamy peanut butter for the smoothest texture
- Avoid natural peanut butter unless well-stirred
- Press the base firmly to prevent crumbling
- Let chocolate cool slightly before spreading
- Chill fully before slicing
Serving Suggestions
No-bake peanut butter bars are great for:
- Casual gatherings
- Potlucks
- Bake sales
- After-dinner treats
Serve them:
- Chilled for clean slices
- Slightly softened at room temperature for creamier bites
They pair well with:
- Cold milk
- Coffee
- Hot chocolate
Storage & Make-Ahead Tips
Refrigerator:
- Store in an airtight container
- Keeps fresh for up to 7 days
Freezer:
- Freeze for up to 2 months
- Thaw in the refrigerator before serving
Layer parchment paper between bars to prevent sticking.
Easy Variations
Chocolate Lovers Version
- Use dark chocolate for the topping
- Add cocoa powder to the base
Crunchy Peanut Butter Bars
- Use crunchy peanut butter
- Add crushed peanuts for texture
Healthier-Style Bars
- Reduce powdered sugar slightly
- Add ground flaxseed or oats
Dairy-Free Option
- Use plant-based butter and dairy-free chocolate
Salted Peanut Butter Bars
- Sprinkle flaky salt over the chocolate before setting
Common Mistakes to Avoid
- Using oily natural peanut butter
- Skipping parchment paper
- Not pressing the base firmly enough
- Overheating the chocolate
- Cutting before fully chilled
FAQs
Can I make these ahead of time?
Yes, they’re ideal to prepare a day or two in advance.
Do they need to stay refrigerated?
They hold best in the fridge, especially in warm climates.
Can I reduce the sweetness?
Yes, slightly reduce powdered sugar or use darker chocolate.
Are these freezer-friendly?
Very much so — they freeze and thaw beautifully.
Can I double the recipe?
Yes, use a 9×13-inch pan and double all ingredients.
A Recipe You’ll Always Come Back To
No-bake peanut butter bars are the kind of treat that never feels outdated. They’re simple, comforting, and deeply satisfying, proving that you don’t need complicated techniques to make something truly enjoyable. Whether you’re sharing them with friends or keeping a stash in the fridge just for yourself, these bars always deliver that familiar, peanut-butter-and-chocolate comfort that everyone loves.
No-Bake Peanut Butter Bars
Ingredients
- 1½ cups creamy peanut butter
- ½ cup unsalted butter melted
- 1½ cups powdered sugar
- 1½ cups graham cracker crumbs
- 1 teaspoon vanilla extract
- Pinch of salt
- 1½ cups semi-sweet chocolate chips
- 2 tablespoons peanut butter or butter
Instructions
- Line an 8×8-inch pan with parchment paper, leaving overhang.
- In a bowl, mix peanut butter, melted butter, powdered sugar, vanilla, and salt until smooth.
- Stir in graham cracker crumbs until thick and pressable.
- Press the mixture firmly and evenly into the prepared pan.
- Melt chocolate chips with peanut butter or butter in 20–30 second intervals, stirring until smooth.
- Spread chocolate evenly over the peanut butter base.
- Refrigerate until fully set.
- Lift out using parchment and slice into bars.