
Ninja Creami M&M Ice Cream: A Colorful & Crunchy Treat
If you love the combination of creamy vanilla ice cream and crunchy, chocolatey M&M’s, then this Ninja Creami M&M Ice Cream is a must-try! With the Ninja Creami, you can make smooth, homemade ice cream that’s packed with colorful candy pieces—just like the ones you’d find in your favorite ice cream shops, but even better.
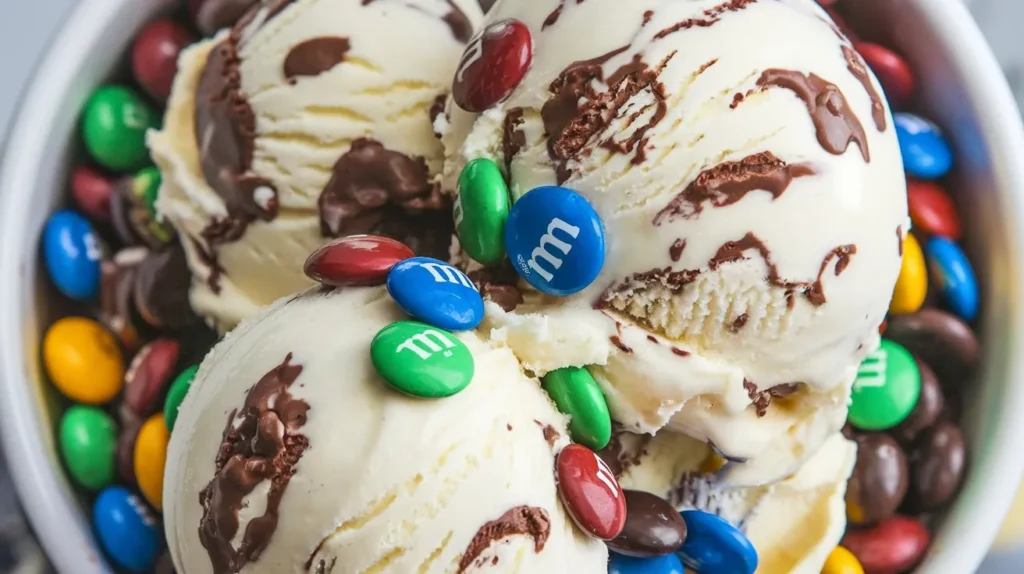
Whether you’re making this for kids or just indulging your inner child, this fun and delicious treat is guaranteed to be a hit!
Why I Love This Recipe
This ice cream is fun, easy, and packed with flavor. Here’s why it’s a favorite in my kitchen:
- Super simple ingredients – You probably already have everything you need!
- The perfect balance – Creamy vanilla ice cream + crunchy M&M’s = a match made in heaven.
- Customizable – Use mini M&M’s, peanut M&M’s, or mix in other candies for a fun twist.
- A great treat for all ages – Who doesn’t love M&M’s in ice cream?
If you’re craving a colorful, chocolate-studded ice cream that’s creamy and delicious, this Ninja Creami M&M Ice Cream is the one to try!
 Printable PDF · 51 PagesMeal Planning & Grocery Budget PlannerWeekly menus, shopping lists & savings in one system.Weekly & monthly meal plansGrocery lists, price book & budget trackerMeal prep & food waste tracker$10$7.5025% OFFGet the Planner →Instant PDF download
Time & Servings:
- Prep Time: 5 minutes
- Freeze Time: 24 hours
- Spin Time: 5–10 minutes
- Total Time: ~24 hours
- Servings: 4–6
Gather These Ingredients and Their Impact on Flavor
Every ingredient in this recipe plays a role in making the smoothest, richest, and most flavorful ice cream.
1. Heavy Cream (1 cup)
This adds richness and creaminess, making the ice cream smooth and indulgent.
2. Whole Milk (1 cup)
Balances the heavy cream and keeps the ice cream from becoming too thick. It also helps achieve that classic scoopable texture.
3. Granulated Sugar (½ cup)
Sweetens the ice cream while also helping with the soft, creamy texture. Sugar prevents the ice cream from freezing too hard.
4. Vanilla Extract (1 tablespoon)
Adds warmth and depth to the base, giving it a classic vanilla flavor that pairs perfectly with the M&M’s.
5. Pinch of Salt
Enhances the sweetness and balances the flavors, making every bite more delicious.
6. M&M’s (½ to ¾ cup, plus extra for topping)
The star of the show! These little chocolate candies add crunch, sweetness, and a pop of color. Mini M&M’s work great because they spread more evenly throughout the ice cream, but you can use regular M&M’s or even peanut M&M’s for extra texture.
How to Make Ninja Creami M&M Ice Cream
Step 1: Prepare the Ice Cream Base
- In a medium mixing bowl, whisk together the heavy cream, whole milk, sugar, vanilla extract, and salt until the sugar is fully dissolved.
- Pour the mixture into the Ninja Creami pint container, making sure it doesn’t go past the max fill line.
Step 2: Freeze the Base
- Cover the pint container with its lid and place it in the freezer for at least 24 hours.
- The base must be completely solid before processing in the Ninja Creami.
Step 3: Process in the Ninja Creami
- Remove the frozen pint from the freezer and place it into the Ninja Creami machine.
- Select the “Ice Cream” function and let the machine churn it into a creamy texture.
- After the cycle is complete, check the texture. If it looks crumbly or too firm, use the “Re-Spin” function to smooth it out.
Step 4: Add the M&M’s
- Create a small well in the center of the ice cream.
- Add ½ to ¾ cup of M&M’s into the well.
- Place the pint back in the Ninja Creami and use the “Mix-In” function to evenly distribute the candies throughout the ice cream.
Step 5: Serve & Enjoy!
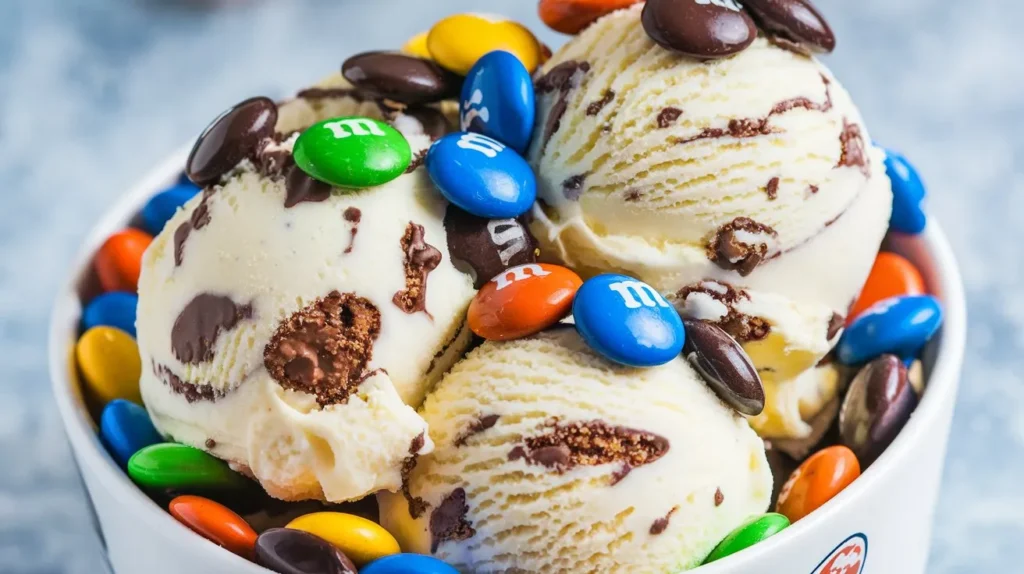
- Scoop your homemade M&M ice cream into bowls or cones.
- Sprinkle a few extra M&M’s on top for even more crunch and color.
- Enjoy immediately, or store in the freezer for later!
Tips & Substitutions
- For extra crunch: Freeze some whole M&M’s before adding them to the ice cream so they don’t soften too much.
- Want a different flavor? Try using chocolate or peanut butter ice cream base instead of vanilla!
- Dairy-free option: Substitute with coconut cream and almond milk, but expect a slightly different texture.
- Mix it up! Add chopped peanut M&M’s, caramel swirls, or crushed Oreos for even more fun flavors.
Serving Suggestions: Fun Ways to Enjoy M&M Ice Cream
This Ninja Creami M&M Ice Cream is delicious on its own, but here are some fun ways to take it up a notch:
1. M&M Ice Cream Sundae
Top your ice cream with:
- Chocolate syrup or caramel drizzle
- Whipped cream and sprinkles
- Chopped M&M’s for extra crunch
2. Make an M&M Ice Cream Sandwich
Scoop your ice cream between two chocolate chip cookies for a homemade ice cream sandwich.
3. M&M Milkshake
Blend a scoop of ice cream with a splash of milk for a thick and creamy M&M milkshake.
4. Pair It with Warm Brownies or Cookies
The hot-and-cold contrast is incredible! Serve your ice cream over freshly baked brownies or warm cookies.
Storage & Softening Tips
How to Store Your Ice Cream
- Keep it in an airtight container to prevent freezer burn.
- Press plastic wrap directly onto the surface before sealing to keep it fresh.
- Best enjoyed within 1-2 weeks for the creamiest texture.
How to Soften Before Serving
- If the ice cream is too firm, let it sit at room temperature for 5-10 minutes before scooping.
- Use the “Re-Spin” function if needed to restore a creamy consistency.
Mistakes I Made (That You Should Avoid!)
The first time I made this, I made some rookie mistakes that I don’t want you to repeat!
1. Adding M&M’s Before Freezing
I thought mixing the M&M’s into the base before freezing would make them blend better. Wrong! The candies sank to the bottom and lost their crunch. Always add M&M’s AFTER the first spin using the Mix-In function.
2. Skipping the “Re-Spin” Function
The first time I processed my ice cream, it came out a little crumbly and too firm. I almost threw it out, but then I realized I could just hit “Re-Spin”, and it turned out perfectly creamy! Don’t skip this step if your ice cream looks too dry.
3. Not Freezing the Base Long Enough
I was impatient and only froze my base for 12 hours instead of 24. Big mistake! The ice cream was too soft and didn’t get the right texture. Always freeze for a full 24 hours for best results.
Frequently Asked Questions
1. How many servings does one batch make?
One batch typically makes about 4-6 servings, depending on portion size. If you’re serving a crowd, consider doubling the recipe!
2. Can I use different types of M&M’s in this recipe?
Yes! You can customize your ice cream with different M&M varieties:
- Mini M&M’s – Better distribution throughout the ice cream.
- Peanut M&M’s – Adds crunch and a nutty flavor.
- Caramel or Pretzel M&M’s – A fun, sweet-and-salty twist!
3. What if my ice cream turns out too hard?
If your ice cream is too firm, try these fixes:
- Let it sit at room temperature for 5-10 minutes before scooping.
- Use the “Re-Spin” function on the Ninja Creami to restore a smooth and creamy consistency.
4. Can I make this ice cream dairy-free?
Absolutely! Here’s how to make a dairy-free version:
- Replace heavy cream with coconut cream for a rich texture.
- Swap whole milk with almond, oat, or cashew milk.
- Use dairy-free M&M-style candies for a completely lactose-free treat.
5. How long does homemade M&M ice cream last in the freezer?
For the best flavor and texture, enjoy your ice cream within 1-2 weeks. To keep it fresh:
- Store it in an airtight container to prevent freezer burn.
- Press plastic wrap directly on the surface before sealing the lid to minimize ice crystal formation.
Final Thoughts: The Perfect M&M Ice Cream Awaits!
If you love M&M’s, this Ninja Creami M&M Ice Cream is a must-try! It’s creamy, colorful, and full of crunchy chocolate goodness. Whether you enjoy it plain, as a sundae, or in a milkshake, this homemade treat is guaranteed to bring smiles to everyone’s faces.
So grab your Ninja Creami, whip up a batch, and enjoy every crunchy, creamy bite!

Ninja Creami M&M Ice Cream

Ingredients
- 1 cup heavy cream
- 1 cup whole milk
- ½ cup granulated sugar
- 1 tbsp vanilla extract
- Pinch of salt
- ½ to ¾ cup M&M’s plus extra for topping
Instructions
- Mix the Base
- In a medium bowl, whisk together heavy cream, milk, sugar, vanilla, and salt until the sugar is fully dissolved.
- Freeze the Base
- Pour the mixture into your Ninja Creami pint container (don’t exceed the max fill line).
- Cover with the lid and freeze for 24 hours until solid.
- Spin in Ninja Creami
- Remove frozen pint from freezer and place it into the Ninja Creami machine.
- Use the “Ice Cream” function. If it looks crumbly, press “Re-Spin.”
- Add the M&M’s
- Create a small well in the center and pour in ½–¾ cup M&M’s.
- Use the “Mix-In” function to evenly distribute.
- Serve & Enjoy!
- Scoop into bowls or cones, top with extra M&M’s, and dig in!
- Store leftovers in the freezer in an airtight container with plastic wrap on the surface.
Notes
- For extra crunch: Freeze M&M’s before mixing in.
- Dairy-free option: Use coconut cream + almond milk.
- Switch it up: Try peanut M&M’s, caramel swirls, or crushed Oreos.
- Too firm? Let sit for 5–10 minutes or use the Re-Spin function.