
Chocolate Lava Brownie Cups
Chocolate Lava Brownie Cups are what I make when I want something deeply chocolatey without committing to a full dessert project. They look impressive, taste indulgent, and yet the method is surprisingly forgiving once you understand one key thing: timing matters more than anything else. I’ve overbaked these before and ended up with regular brownie cups—still good, but missing that molten center. When baked just right, though, the middle stays soft, glossy, and spoonable, which is exactly what makes these special.
Why These Brownie Cups Work So Well
These are richer than a standard brownie and more relaxed than a classic lava cake.
- Individual portions with gooey centers
- Crisp edges with soft, fudgy interiors
- Faster and easier than traditional lava cakes
- Perfect for dinner parties or portion control
- Customizable with fillings and toppings
Ingredients
Brownie Batter
- ½ cup unsalted butter
- 4 oz semi-sweet chocolate, chopped
- ¾ cup granulated sugar
- ¼ cup brown sugar
- 2 large eggs, room temperature
- 1 teaspoon vanilla extract
- ½ cup all-purpose flour
- ¼ cup unsweetened cocoa powder
- ¼ teaspoon salt
Lava Center
- 6–8 teaspoons chocolate hazelnut spread, chocolate ganache, or chocolate chunks
Optional Add-Ins
- Espresso powder (½ teaspoon)
- Chocolate chips
- Chopped walnuts or pecans
Instructions / Method
Step 1: Prepare the Pan and Oven
- Preheat oven to 375°F (190°C)
- Grease a standard muffin pan very well
- Optional: dust lightly with cocoa powder
Step 2: Melt Chocolate and Butter
- Melt butter and chopped chocolate together
- Use a microwave in short bursts or a double boiler
- Stir until smooth and glossy
- Let cool slightly
Step 3: Mix the Batter
- Whisk granulated sugar and brown sugar into chocolate mixture
- Add eggs one at a time, whisking well
- Stir in vanilla extract
- Fold in flour, cocoa powder, and salt just until combined
Step 4: Assemble the Cups
- Spoon batter into muffin cavities, filling halfway
- Add 1 teaspoon lava filling to the center of each
- Top with remaining batter until about ¾ full
Step 5: Bake
- Bake for 10–12 minutes
- Edges should look set
- Centers should still look slightly soft and glossy
Step 6: Rest and Release
- Let brownie cups rest for 2–3 minutes
- Carefully loosen edges with a knife
- Serve warm for best lava effect
Preparation & Baking Time
- Prep Time: 15 minutes
- Bake Time: 10–12 minutes
- Rest Time: 3 minutes
- Total Time: About 30 minutes
- Servings: 8–10 brownie cups
Texture and Flavor Breakdown
These brownie cups are all about contrast.
- Crisp, chewy edges
- Dense, fudgy brownie layer
- Warm, molten chocolate center
- Deep cocoa flavor without bitterness
When cut or spooned into, the center slowly flows rather than spills, which is exactly the goal.
 Printable PDF · 51 PagesMeal Planning & Grocery Budget PlannerWeekly menus, shopping lists & savings in one system.Weekly & monthly meal plansGrocery lists, price book & budget trackerMeal prep & food waste tracker$10$7.5025% OFFGet the Planner →Instant PDF download
Key Tips for Perfect Lava Centers
- Don’t overbake—even one extra minute matters
- Use room-temperature eggs for smoother batter
- Chill the filling slightly if your kitchen is warm
- Grease the pan thoroughly to avoid sticking
- Test one cup first if unsure about timing
Serving Suggestions
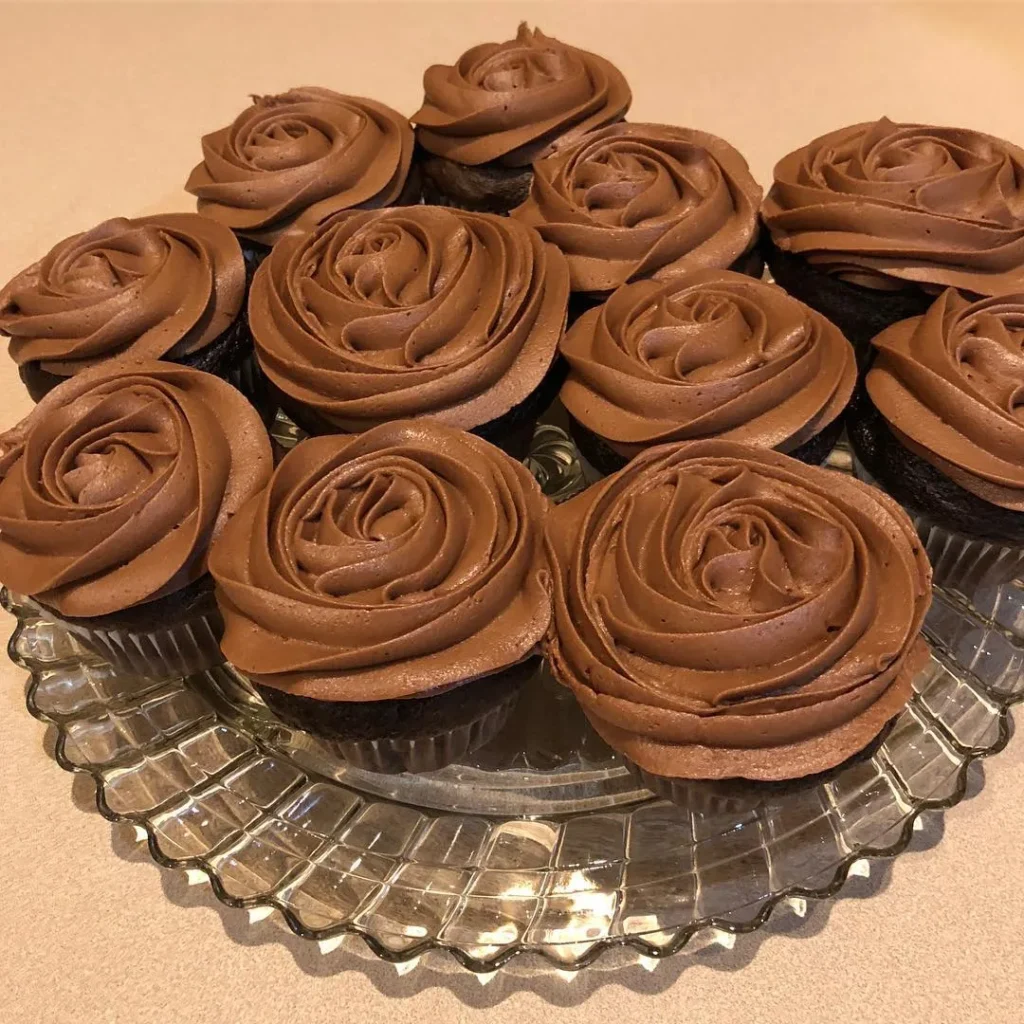
Chocolate Lava Brownie Cups are best served warm and simple.
- Dust with powdered sugar
- Add vanilla ice cream or whipped cream
- Garnish with berries
- Drizzle with chocolate or caramel sauce
They’re rich enough that a little goes a long way.
Storage and Make-Ahead Tips
Refrigerator
- Store baked cups up to 3 days
- Reheat gently to restore lava center
Freezer
- Freeze unbaked assembled cups
- Bake straight from frozen, adding 1–2 minutes
Reheating
- Microwave 10–15 seconds
- Avoid overheating or center will firm up
Easy Variations
Peanut Butter Lava Brownie Cups
- Add a teaspoon of peanut butter in the center
Salted Caramel Brownie Cups
- Use caramel squares or thick caramel sauce
- Sprinkle flaky salt on top
Espresso Chocolate Lava Cups
- Add espresso powder to batter
- Enhances chocolate depth
White Chocolate Center
- Swap filling for white chocolate chunks
Common Mistakes to Avoid
- Overbaking until fully firm
- Skipping pan greasing
- Using thin chocolate filling
- Overmixing the batter
- Letting cups cool too long before serving
Frequently Asked Questions
How do I know when they’re done?
Edges should be set, centers slightly soft and shiny.
Can I make these without a filling?
Yes, but they’ll be fudgy brownie cups, not lava-style.
Can I use boxed brownie mix?
Yes, use a thick, fudgy-style mix and reduce bake time.
Do these need to be served immediately?
For the best lava effect, yes, but reheating works well.
Can I make them gluten-free?
Use a 1:1 gluten-free flour blend.
Why These Brownie Cups Never Disappoint
Chocolate Lava Brownie Cups hit that sweet spot between comfort and indulgence. They don’t require special equipment or complicated steps, yet they feel like a restaurant dessert when served warm. Whether you’re making them for guests or just because the craving hits, they deliver rich chocolate satisfaction every single time.
Chocolate Lava Brownie Cups
Ingredients
- Brownie Batter
- ½ cup unsalted butter
- 4 oz semi-sweet chocolate chopped
- ¾ cup granulated sugar
- ¼ cup brown sugar
- 2 large eggs room temperature
- 1 teaspoon vanilla extract
- ½ cup all-purpose flour
- ¼ cup unsweetened cocoa powder
- ¼ teaspoon salt
- Lava Center
- 6 –8 teaspoons chocolate hazelnut spread chocolate ganache, or chocolate chunks
- Optional Add-Ins
- ½ teaspoon espresso powder
- Chocolate chips
- Chopped walnuts or pecans
Instructions
- Preheat oven to 375°F (190°C) and grease a standard muffin pan very well
- Melt butter and chopped chocolate together until smooth, then cool slightly
- Whisk granulated sugar and brown sugar into the chocolate mixture
- Add eggs one at a time, whisking well, then stir in vanilla
- Fold in flour, cocoa powder, and salt just until combined
- Spoon batter halfway into each muffin cavity
- Add 1 teaspoon lava filling to the center of each
- Top with remaining batter until about ¾ full
- Bake for 10–12 minutes until edges are set and centers look soft
- Rest 2–3 minutes, loosen edges, and serve warm